Smart home design, energy efficiency, and connected lighting guidance.

Blog

  • Home Automation Trends Worth Paying Attention To

    Home automation is supposed to make life easier—not turn every evening into a troubleshooting session. The good news: a handful of practical capabilities are becoming standard, and they’re the ones you can plan around without overhauling your whole home.

    When you’re shopping smart home features, you probably wonder: What’s actually useful now? Where does automation help vs just add buttons? And how do I keep things private and secure without turning into a full-time IT person? (Even if you enjoy puzzles.)

    That “useful now” line matters because smart home ecosystems are growing fast, and security guidance from experts consistently emphasizes basic hardening steps—like strong passwords, regular updates, and careful account permissions—before you connect more devices. A practical overview is available from the FTC’s guidance for connected devices, and general IoT security principles are also summarized by the OWASP Internet of Things guidance.

    In this guide, This article maps the home automation trends worth paying attention to (and which ones usually add complexity). You’ll also get a quick checklist you can use before you buy your next device or automate your next “scene.”

    Table of contents

    Which automation features are becoming more common

    Big-picture trend: smart homes are shifting from “cool gadget control” toward repeatable routines. Instead of manually tapping devices all day, more homeowners are building automation around what they already do—morning, leaving, bedtime, arriving home—and letting sensors and rules handle the predictable parts.

    Here are the capabilities that show up again and again because they solve common problems:

    • Rule-based automation (if this happens, do that): triggered by time, location, motion, door/window state, or sensor readings.
    • Room-level scenes: “Goodnight” turns multiple devices into a consistent setup (lights, thermostat mode, maybe a lock), without needing separate taps.
    • Better app dashboards: clearer device lists, status at a glance, and fewer “mystery states.”
    • More reliable notifications: alerts that prioritize what matters (e.g., door opened) rather than spamming every event.
    • Local controls where possible: at minimum, the option to keep basic functions working even if the internet is temporarily unavailable.
    Residents interacting with a smart home setup in a family living space

    Voice control, sensors, and scene-based routines

    1) Voice control for “hands-busy” moments

    Voice control isn’t magic, but it’s becoming more practical for moments like: cooking, carrying groceries, or settling kids in. The best use cases are usually simple, confirmable commands—like “Turn the living room lights to 30%” or “Start the bedtime routine.”

    Tip: before you rely on voice, check how your system handles ambiguity. If you often say “living room” and it confuses the device set, voice will quickly become a frustration machine.

    2) Sensors that trigger meaningful changes

    Sensors are most useful when they connect to real outcomes—comfort, safety, and energy waste reduction. Common examples:

    • Motion/occupancy to turn lights on when someone is actually present.
    • Door/window contacts for security-aware routines (e.g., “If a door opens after 10pm, send a notification”).
    • Light and temperature sensors to adjust automatically when the environment changes.

    The “plain version” is simple: if a sensor won’t change anything you care about, it’s probably not worth adding.

    3) Scene-based routines that reduce mental load

    Scenes are the underrated trend. A scene turns multiple settings into one action. When scenes are done well, they do two things:

    • Reduce steps (one tap instead of five).
    • Reduce mistakes (lights, temperature, and security states stay consistent).

    Try building scenes around transitions you already experience:

    • Arriving home: welcome lighting, adjust thermostat mode, unlock if that’s part of your workflow.
    • Leaving: set lights to off/away mode, arm security mode, and confirm doors are closed.
    • Bedtime: dim, silence notifications, set a comfortable temperature, and lock the perimeter.

    Tip: start with one or two scenes first. Once they feel predictable, expand.

    Privacy and security considerations

    More connectivity can mean more data moving around. The safest approach is boring on purpose: assume any internet-connected device could be targeted, then reduce exposure.

    • Use strong, unique passwords for each ecosystem and turn on multi-factor authentication where available.
    • Keep firmware updated. Many “security” improvements come from updates, not from brand-new hardware.
    • Review permissions for accounts, shared users, and any “share access” options you enable for family.
    • Check where control happens: does the device offer basic local operation or a fallback mode?
    • Be careful with cameras and microphones: if you add audio/video, make sure you understand how recordings are stored and when they’re shared.

    For broader security principles, OWASP’s IoT guidance is a helpful starting point. For consumer-focused safety framing, the FTC’s connected-device tips are also worth reading.

    How to choose trends that fit real daily life

    A smart-home feature is “worth paying attention to” when it makes your routine simpler—not when it merely sounds advanced.

    Here’s how to evaluate a new feature without getting hypnotized by demos:

    Start with the problem, not the gadget

    Ask: What time or friction does this remove? If the answer is vague (“it will feel smarter”), skip it. If the answer is specific (“I always forget to turn off the hall light”), you’re on the right track.

    Look for predictable triggers

    Great automation is easy to explain: “When I leave, lights go off and the system arms.” If the trigger chain requires guesswork, you’ll spend more time correcting than enjoying.

    Choose features with clear “off switches”

    You want the ability to pause a routine or disable a device quickly—especially if you have guests, pets, or a temporary schedule change.

    Prefer incremental upgrades

    Instead of replacing everything at once, add one capability to one part of the house. Your learning curve stays small, and you can abandon what doesn’t work.

    When your home starts behaving predictably, you’re likely seeing trends that actually deliver.

    What to ignore if it adds complexity

    Not every “smart” idea is practical. Here are common complexity traps:

    • Automation that depends on perfect timing (GPS drift, unreliable geofences, sensors that misread).
    • Too many routines that overlap (“scene A turns lights on, scene B turns them off, but which runs first?”).
    • High-maintenance rules requiring frequent manual tweaks.
    • Features that only work through one app without any fallback or basic controls.
    • Vendor-style comparisons without your own requirements. Compatibility matters only in the context of how you plan to use the system.

    In short: if it adds steps, troubleshooting, or confusion, it’s not helping you.

    A short checklist for evaluating new features

    Before you buy or automate, run this quick test:

    Question Good sign Red flag
    Does it map to an existing routine? Yes—morning, leaving, bedtime, arriving No—feels like “because we can”
    Can you explain the trigger? Clear “if X then Y” logic Hard to predict outcomes
    Will it work when internet is slow? Basic fallback/local behavior Total dependence on remote servers
    Can you pause it? Easy disable/pause controls No straightforward way to stop it
    Is it secure by default? Updates + strong auth options Weak password/app-only sharing

    If you can answer “yes” to the good-sign column for most rows, you’re probably looking at a trend that’s useful now.

    Key takeaways

    • Home automation is trending toward repeatable routines, not just device control.
    • Voice, sensors, and scenes are most valuable when they reduce friction in daily moments.
    • Security is part of setup: strong passwords, updates, and careful permissions matter.
    • Pick features you can understand and pause—complex automation often becomes maintenance.

    If you’re planning your next step, start with a broader overview on these guides: Innovative Smart Home Designs, plus deeper practical support on Smart Lighting Solutions.

    Have a question about what to automate first? Contact us and share what your days look like. A member of the team can translate goals into a simple setup plan.

  • A Beginner’s Guide to Intelligent Climate Control

    A Beginner’s Guide to Intelligent Climate Control

    Intelligent climate control isn’t about gadgets for their own sake—it’s about keeping your home comfortable with less wasted heating and cooling effort.

    When you start looking into smart thermostats and climate automation, you’re probably asking: Will it actually make day-to-day comfort easier? What sensors and schedules really do? Where does automation help—and where is manual control better? As the U.S. Department of Energy notes, heating and cooling are often major contributors to home energy use, so smarter control strategies can matter.

    That’s also why credible building science organizations encourage homeowners to focus on control and efficiency fundamentals rather than chasing one “magic device.” For background on HVAC energy considerations, see the U.S. Department of Energy: Heating and Cooling and for thermostat/controls basics, the Energy Saver guidance on thermostats.

    In this beginner’s guide, you’ll learn what intelligent climate control means in practical terms, how thermostats, sensors, and zoning work together, and how to set comfort profiles by room and time of day—without turning your HVAC into a confusing science project.


    Table of contents


    A smart home adapter on a countertop, illustrating connected home climate control basics

    What intelligent climate control means in practical terms

    Intelligent climate control is a control approach that adjusts heating and cooling behavior based on more than a single wall thermostat reading. Instead of “set it and forget it,” it uses a combination of:

    • Current indoor conditions (temperature and sometimes humidity)
    • Environmental context (weather forecasts or outdoor temperature)
    • Home behavior (occupancy patterns and room-level activity)
    • Heating/cooling goals (comfort preferences and time-based routines)

    The goal is simple: keep comfort stable while reducing unnecessary cycling, over-heating, or over-cooling. That typically requires less “manual micromanaging,” but it still depends on choosing sensible settings for your household.

    Thermostats, sensors, zoning, and schedules

    Most climate automation systems combine four building blocks.

    1) Thermostats: the decision center

    Your thermostat (wired or wireless) sets the baseline temperature control logic. Many modern thermostats can learn routines, adapt start times, and coordinate with schedules so the system reaches the target when you need it—not just whenever it feels like it.

    2) Sensors: improving accuracy beyond “one spot”

    A wall thermostat measures the temperature where it’s mounted. In real homes, that can be misleading: hallways run cooler, sunny rooms heat up quickly, and bedrooms can lag behind.

    Room or “remote” sensors help by sampling temperatures where people actually spend time. Some setups also track humidity for better comfort and to avoid drying/clammy conditions.

    3) Zoning: comfort by area, not by house average

    Zoning means directing heating/cooling output to different parts of the home. When zoning is available, automation can target comfort where it matters most (for example, keeping living areas comfortable while an unoccupied room stays slightly wider).

    Not every home has zoning, and upgrading HVAC components can be more involved. The beginner path is to start with controls that work with what you already have.

    4) Schedules: giving automation a “when”

    Schedules are the foundation for predictable comfort. Intelligent features then refine timing (preheating or precooling), reducing the temptation to frequently adjust settings.

    As a baseline, many homeowners do well with a small set of comfort periods (wake, work/school, evening, sleep) instead of dozens of micro-adjustments.

    How occupancy and weather data can help

    Once comfort targets are defined, the system still needs to decide when to act. Two signals are especially useful.

    Occupancy patterns: “who’s home”

    Some setups infer occupancy from mobile device presence, motion sensors, or learned daily routines. When the home is empty, the system can widen the comfort range slightly to avoid unnecessary conditioning.

    Important: occupancy-aware behavior works best when your home’s patterns are fairly consistent (or when you can easily update profiles after changes).

    Weather data: preparing instead of reacting

    Outdoor conditions affect indoor temperature trends. With weather awareness, controls can respond earlier—aiming to reach comfort goals by the time you want them, rather than waiting for the indoor temperature to drift.

    This is less about “predictive magic” and more about reducing overshoot and undershoot.

    Comfort settings for different rooms and times of day

    Beginner-friendly comfort settings are about consistency and clear priorities. A practical approach:

    Time period Typical goal Beginner-friendly setup idea
    Morning Arrive comfortable Use a “wake” profile; let automation handle start timing
    Day (away) Maintain, don’t overcondition Widen the range slightly for unoccupied rooms
    Evening Comfort for main living time Focus on occupied zones; avoid constant re-tuning
    Night Stable sleep comfort Use a “sleep” profile and keep changes minimal

    If you have room sensors, start by identifying the rooms you care about most (usually where you sleep, work, or spend the most time). Then set goals for those rooms first. Small adjustments are safer than big swings, especially during seasonal transitions.

    Humidity and comfort

    If your system supports humidity monitoring, treat humidity as a comfort factor—not a separate project. The aim is usually to avoid conditions that feel muggy or overly dry, while keeping the temperature stable.

    When automation helps (and when manual control is better)

    Automation is valuable when it reduces repetitive effort and smooths out comfort variation. But there are moments when manual control makes more sense.

    Automation is often a win when:

    • Your daily routine is predictable
    • You have temperature swings between rooms
    • You frequently forget to adjust settings (or adjust too often)
    • You want fewer “trial-and-error” adjustments during the week

    Manual control is often better when:

    • Life patterns are irregular (shift work, frequent travel, unexpected guests)
    • You want immediate changes for short events (for example, a quick party window)
    • You’re still learning how your home responds to heating/cooling

    A healthy beginner mindset: automation should do the baseline work, while you keep the option to override temporarily and update settings as you learn.

    Questions to ask before upgrading

    Before you replace a thermostat or add sensors, use this checklist. It protects you from the most common “it sounded good, but it didn’t fit” outcomes.

    • What exactly is your goal? Better comfort in bedrooms? More consistent temperatures? Fewer adjustments?
    • How many zones do you need? If you only want help for one or two rooms, remote sensors may be enough.
    • How accurate is the current thermostat location? Is it near drafts, direct sun, or heat sources?
    • How easy is it to update schedules? Your system should handle schedule changes without complex reconfiguration.
    • Does it support the features you will actually use? Presence detection, weather awareness, and humidity tracking are useful only if they match your routine.
    • What’s the fallback plan? If automation is wrong, can you quickly switch to manual comfort targets?

    If you want additional background on how thermostats and controls affect energy use, start with the U.S. Department of Energy’s Thermostats overview (and confirm the recommendations align with your climate and HVAC setup).


    Conclusion: start simple, then refine

    Intelligent climate control is most useful when it’s treated as a comfort system, not a gadget collection. Begin with clear schedules, understand how thermostat placement and room differences affect readings, and add sensors/zones only as they solve a real problem in your home.

    Key takeaways:

    • Use automation to smooth comfort and reduce repetitive adjustments.
    • Improve accuracy with sensors where temperature varies by room.
    • Let occupancy and weather awareness help with timing—without removing your ability to override.
    • Choose a small number of comfort periods that match your household rhythm.

    Ready to explore how smart home choices support a greener, more efficient home? Visit Energy Efficiency and Sustainability. Or if you’d like help planning your next upgrades, contact the team via our contact page.

  • Smart Lighting Solutions for Every Room in the House

    Smart Lighting Solutions for Every Room in the House

    {“title”:”Smart Lighting Solutions for Every Room in the House”,”post_name”:”smart-lighting-solutions-every-room”,”author_id”:10,”content”:”

    n

    Smart lighting shouldn’t feel like another app you have to manage. With a few practical design choices—layered brightness, the right color temperature, and sensible scenes—you can make every room in your home feel more comfortable, easier, and more “you.”

    nn

    When you start looking at smart lights, you might wonder: What can smart lighting do beyond on/off? How do I pick warm vs. cool light? And how can I avoid over-automation that gets in the way? As the U.S. Department of Energy notes, the choices you make about lighting efficiency and quality can significantly affect how well spaces serve the people using them.

    nn

    On top of comfort, lighting is also an everyday sustainability lever. Energy.gov explains that lighting accounts for a meaningful share of household electricity use, so improving efficiency (for example, by using LED technology and controlling light when it’s not needed) can contribute to lower energy waste. Smart controls aren’t magic, but they help you match light to real routines instead of leaving it on “just in case.”

    nn

    By the end of this guide, you’ll have a room-by-room plan: what to aim for in kitchens, bedrooms, hallways, and living spaces, how to think about dimmers, scenes, sensors, and schedules, and a simple checklist you can use before you buy anything.

    n

    nn


    nn

    What smart lighting can do (besides on/off)

    n

    Smart lighting is mostly about control and consistency—the ability to set light levels and behavior in a repeatable way.

    nn

      n

    • Dimming: Adjust brightness to match time of day, tasks, and energy-saving goals.
    • n

    • Scenes: Save “lighting moods” (like Relaxed Evening or Wake-Up) so you don’t rebuild settings each time.
    • n

    • Sensors: Use motion or ambient-light sensing to reduce unnecessary lighting.
    • n

    • Schedules & routines: Automate predictable changes (for example, morning warmth, bedtime dimming).
    • n

    nn

    If this sounds straightforward, it is—until you try to automate everything. The rest of this article is about choosing the right level of automation so your home stays simple.

    nn

    Energy.gov lighting guidance (with utm_source=brehand-gouessant.com) covers the fundamentals of lighting choices and efficiency.

    nn

    nSmart home control adapter connected for everyday home lighting routinesn

    nn


    nn

    Best lighting goals by room

    n

    Instead of starting with fixtures, start with the job each room needs light to do. Here are practical goals that translate into smart lighting features.

    nn

    Kitchen: clarity first, glare last

    n

      n

    • Goal: Bright, even light for prep and cleanup.
    • n

    • Smart approach: Use dimming for “working” vs. “leisure cooking,” and create a scene for evening dining that isn’t harsh on tired eyes.
    • n

    • Watch for: Glare from overhead lights when you’re looking down at counters.
    • n

    nn

    Living room: flexible comfort

    n

      n

    • Goal: Layered brightness that supports conversation, reading, and TV time.
    • n

    • Smart approach: Separate general light from accent or lamp light, then group them into scenes.
    • n

    • Watch for: One “all lights on” setting that never matches what you’re actually doing.
    • n

    nn

    Bedroom: slower changes, gentler tones

    n

      n

    • Goal: Relaxation in the evening and easy visibility when you wake up.
    • n

    • Smart approach: Use schedules for gradual transitions (for example, dim slightly in the late evening).
    • n

    • Watch for: Very bright, very cool light close to bedtime.
    • n

    nn

    Hallways & entryways: safe wayfinding

    n

      n

    • Goal: Reduce trips and surprise brightness.
    • n

    • Smart approach: Motion sensors for short, low-glare light levels at night.
    • n

    • Watch for: Lights that stay on too long or snap on at an uncomfortable level.
    • n

    nn

    Home office: focus without fatigue

    n

      n

    • Goal: Stable, task-friendly lighting for screens and paper.
    • n

    • Smart approach: Automate by time of day and allow manual override so you can fine-tune when working late.
    • n

    • Watch for: Reflections on monitors—sometimes changing brightness beats changing color.
    • n

    nn

    Energy.gov: Lighting Choices also helps you think about what “good lighting” means in real spaces.

    nn


    nn

    Dimmers, scenes, sensors, and schedules—explained simply

    n

    These features solve different problems. Here’s the clean way to tell them apart.

    nn

    n

    n

    n

    n

    n

    n

    n

    n

    n

    n

    n

    n

    n

    n

    n

    n

    n

    n

    n

    n

    n

    n

    n

    n

    n

    n

    n

    n

    n

    n

    Feature What it does Where it’s most useful
    Dimmers Change brightness smoothly Living rooms, bedrooms, kitchens
    Scenes Recall multiple settings at once Living rooms, dining areas, “company over” moments
    Sensors React to motion and/or ambient light Hallways, bathrooms, laundry rooms
    Schedules Follow the clock Bedrooms, offices, general evening routines

    nn

    Useful rule of thumb: if your behavior is predictable, schedules work well; if your behavior is variable, sensors can help; and if you want an “instant mood,” scenes are the best shortcut.

    nn


    nn

    Warm vs. cool light: how to choose for comfort

    n

    Color temperature is the “warmth” of light. In general terms:

    nn

      n

    • Warmer (lower color temperature): Feels cozy and less intense—often better for evenings and bedrooms.
    • n

    • Cooler (higher color temperature): Feels brighter and more alert—often better for task-focused areas like kitchens and home offices.
    • n

    nn

    Rather than chasing a perfect number, aim for a consistent experience. If your living room switches from warm in the evening to cool in the middle of dinner, that can feel jarring even if the room is “well lit.”

    nn

    For deeper background on lighting color quality and terminology, see Energy.gov’s Lighting Choices guide.

    nn


    nn

    How to avoid glare and over-automation

    n

    Two of the most common reasons smart lighting gets frustrating are visual discomfort (like glare) and behavior conflicts (automation fighting your habits).

    nn

    Reduce glare with layered lighting

    n

      n

    • Prefer a mix of ceiling light + lamps rather than only one bright source.
    • n

    • Use dimming for overhead lights instead of relying on “always full brightness.”
    • n

    • When possible, aim accent light so it doesn’t reflect directly into eyes or screens.
    • n

    nn

    Set “hands welcome” rules

    n

    If you manually adjust light and the system immediately overrides you, you’ll start ignoring automations. A calmer pattern is: allow overrides and let the next scene or scheduled change take over later.

    nn

    Start with fewer automations than you think

    n

    Choose one or two wins first—like a bedtime dim scene and hallway night lighting—then expand once your routines are stable.

    nn

    Energy.gov also emphasizes practical, user-centered lighting decisions rather than purely technical upgrades.

    nn


    nn

    A quick checklist for planning a lighting upgrade

    n

    Before you buy, walk through your rooms and decide what “good” looks like.

    nn

      n

    1. List each room’s main jobs: cooking, reading, watching TV, sleeping, wayfinding.
    2. n

    3. Pick your lighting layers: general, task, and accent.
    4. n

    5. Choose brightness ranges: one for tasks, one for everyday comfort, one for evening/bedtime.
    6. n

    7. Decide which features match the job: dimming vs. scenes vs. sensors vs. schedules.
    8. n

    9. Plan for glare: avoid relying on a single overhead light in every situation.
    10. n

    11. Keep overrides easy: make sure manual changes don’t feel punished.
    12. n

    13. Test with real routines: run your scenes/schedules for several days before adding more.
    14. n

    nn

    If you’re also building the broader smart-home setup, you may find the big-picture guide helpful: Home and the blog index can help you connect lighting choices with comfort and energy priorities across the house.

    nn

    Conclusion: Smart lighting works best when it serves the room’s real purpose. Layer brightness, pick comfortable warmth levels, use scenes and schedules for repeatable routines, and add sensors only where they reduce hassle—not where they create it.

    nn

    By following this room-by-room plan, you can upgrade lighting in a way that feels intuitive to live with—no engineering degree required.

    nn


    nn

    External reading:

    n

    “,”featured_id”:1}

  • Energy Efficiency Upgrades That Make the Biggest Difference in a Home

    Energy Efficiency Upgrades That Make the Biggest Difference in a Home

    The fastest way to cut wasted energy is usually not the shiny gadget people brag about later. It is the boring stuff: leaks, insulation gaps, equipment that runs badly, and habits that keep the house doing unnecessary work. That is the whole game. If you want comfort and lower bills, start where the losses are largest and the excuses are weakest.

    Homeowners usually ask the same four questions: where is the energy going, what should be fixed first, which upgrades are actually worth paying for, and what can wait until later? The U.S. Department of Energy’s Energy Saver guidance keeps pointing people toward the same answer: reduce air leaks and improve the building shell before chasing clever controls. The EPA’s indoor air quality guidance also makes the obvious point that a tight house still needs sensible ventilation and sane habits. That is the part people skip because it is less exciting than buying equipment with a shiny screen.

    This article is the practical version. It walks through the biggest energy losses first, then shows where insulation, air sealing, windows, HVAC, thermostats, lighting, and appliance habits actually belong in the priority list. If you want the broader site context, the Energy Efficiency and Sustainability page covers the same theme from a wider angle.

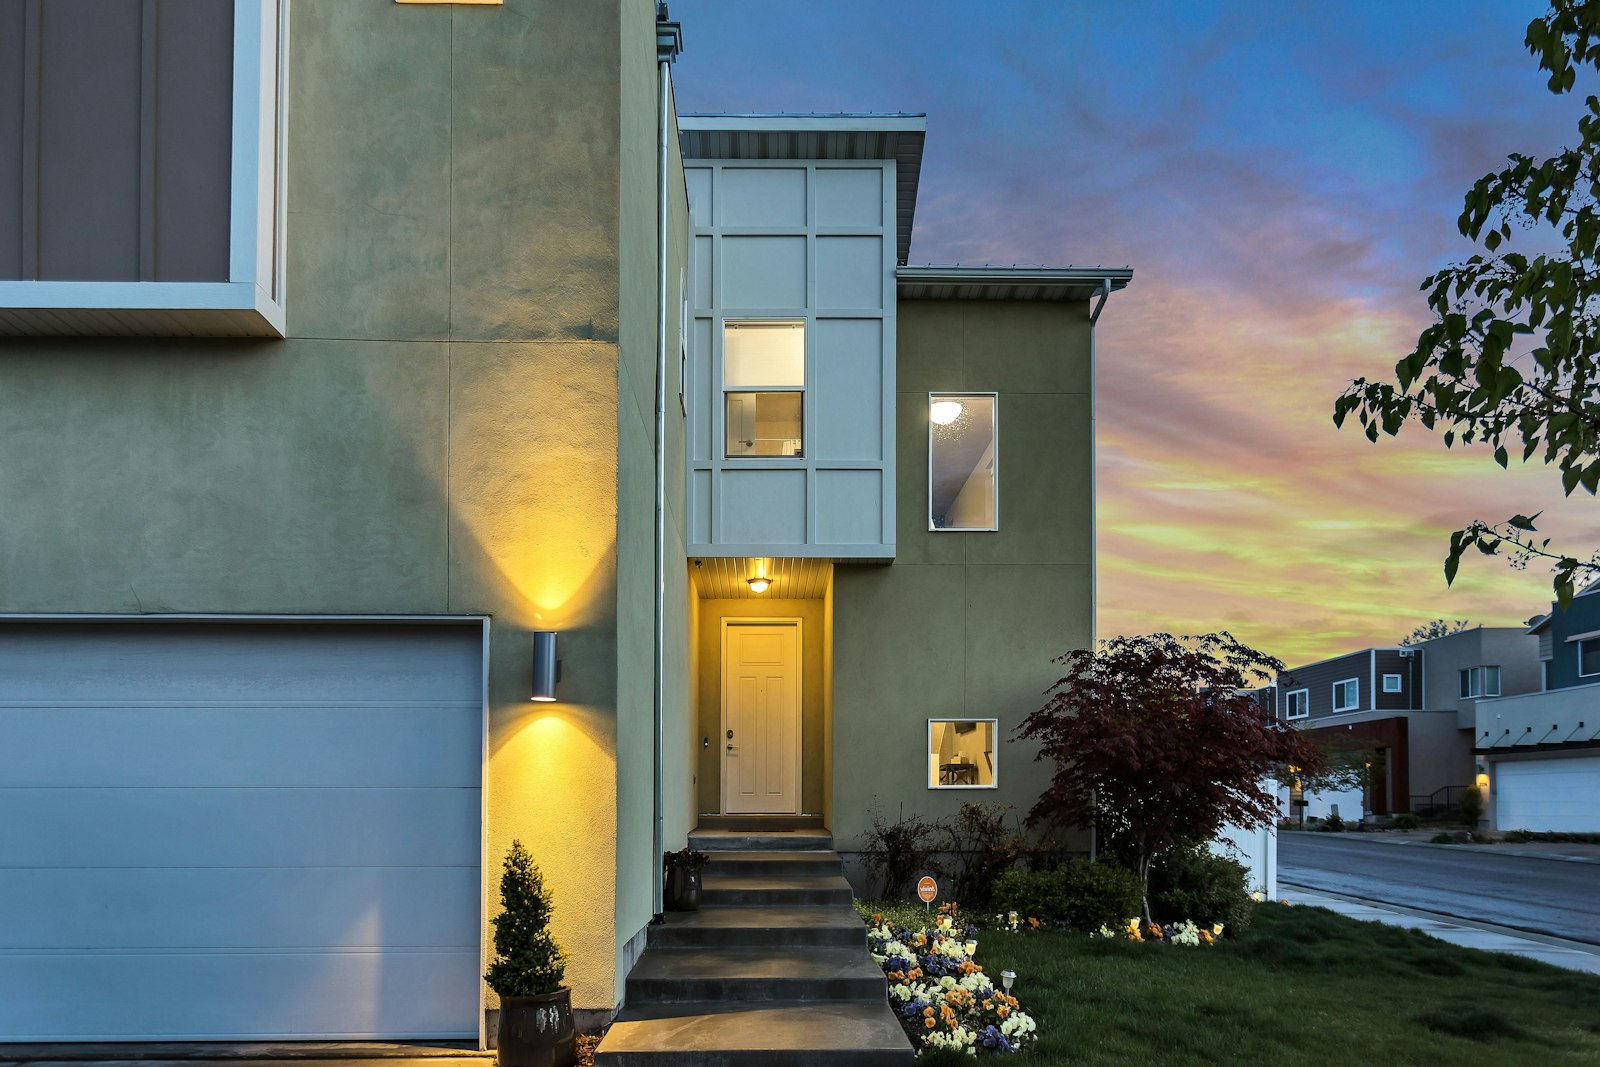
    Energy efficient housing exterior with modern residential design

    What you should expect from this guide is not a miracle. You will get a diagnostic order of operations: what to check first, what tends to matter most, and what often gets too much credit. I care about what is true, not what sounds impressive in a contractor brochure.

    Terminology Before The House Starts Lying To You

    Before you start cutting checks, the language needs to be clear. A lot of waste hides behind jargon that makes ordinary problems sound technical. They are not.

    • Air sealing means closing the gaps where outside air sneaks in and conditioned air leaks out. Think caulk, weatherstripping, spray foam, gasket work, and attic hatch fixes.
    • Insulation slows heat flow through walls, attics, floors, and crawl spaces. It does not stop air leaks by itself, despite the way people talk about it.
    • R-value is the resistance to heat flow. Higher usually means better insulation performance, but installation quality still matters.
    • HVAC means heating, ventilation, and air conditioning. If the system is oversized, dirty, poorly maintained, or badly controlled, it wastes energy fast.
    • LED means light-emitting diode. In plain English: efficient lighting that runs cooler and uses less electricity than old incandescent bulbs.
    • Smart thermostat means a thermostat that can schedule, learn, or adjust set points with more flexibility than a basic manual dial.
    • Zoning means controlling different parts of the house separately instead of heating or cooling the whole building as if every room has identical needs. It is useful when done well and annoying when done badly.

    If you remember only one thing from this section, make it this: air leaks and insulation problems are structural losses, not control problems. A smart thermostat cannot make a draft disappear. It can only negotiate with one.

    How To Identify The Biggest Energy Losses In A Home

    The first diagnostic mistake is obvious: people often guess. They feel a cold room, blame the window, and immediately start shopping for replacements. Sometimes the window is the issue. Sometimes the attic is dumping heat into the sky, the door seals are trash, and the HVAC system is trying to compensate for the whole mess. Symptoms do not always point to the first thing you notice.

    Start with a boring walk-through. On a windy day, stand near the obvious trouble spots: exterior doors, window frames, attic access panels, electrical penetrations, baseboards, recessed lights, and the rim joist area in basements or crawl spaces. You are looking for drafts, temperature swings, moisture clues, and rooms that seem to behave differently from the rest of the house. If one bedroom is always cold and another is always hot, do not assume the thermostat is possessed. It is probably a balance, leakage, or insulation problem.

    A few useful tools make the diagnosis less vague. A thermal camera or infrared thermometer can reveal temperature differences that your hand only half-notices. A professional energy audit can do the same thing with more structure. The EPA’s energy guidance and the DOE’s energy saver materials both point toward the same principle: find the losses before you guess at the fix.

    Here is the simple rule I use: fix the house where energy escapes fastest and most often. In practice, that usually means the attic, then air leaks, then duct losses, then old or poorly performing windows, and only after that the smaller comfort complaints. Not every house follows the exact same order, but the order is usually close enough to be useful.

    Common signs the envelope is weak

    • Rooms that are hard to keep comfortable.
    • Noticeable drafts near windows or doors.
    • Dust and outdoor odors appearing where they should not.
    • Ice dams, moisture stains, or condensation in cold seasons.
    • Heating and cooling equipment that runs constantly without stabilizing the space.

    If several of those signs show up together, the problem is rarely one neat little thing. It is usually a stack of small failures working as a team. That is how houses waste energy: not with a dramatic collapse, but with a lot of small leaks pretending to be normal.

    Insulation, Air Sealing, And Windows: Where To Start

    This is the part where people want to reverse the order because windows are visible and insulation is not. Fine. Visibility is not the same as importance. If the attic is under-insulated or full of bypass leaks, replacing every window in the house may give you a nicer invoice and not much else.

    Start with air sealing. Sealing gaps helps the house hold the temperature it already paid for. That usually means the attic hatch, plumbing penetrations, wiring holes, recessed fixtures, top plates, basement rim joists, and door and window weatherstripping. The work is not glamorous, but it often creates the most immediate comfort improvement because it reduces uncontrolled air movement.

    Then fix insulation. The attic is usually the first place to inspect because heat rises, exits, and then gets blamed on everything else. Walls, floors over unconditioned spaces, and crawl spaces matter too, but attic performance is often the low-hanging fruit. If you are not sure where to start, the DOE’s Energy Saver hub is a better first stop than a sales brochure.

    Windows deserve attention, but they are often overpromised. A new window can improve comfort, reduce drafts, and help with noise. It is not magic. If the rest of the envelope is weak, the window upgrade may be a comfort improvement first and an energy upgrade second. That still has value. It just is not the miracle people are sold.

    Window upgrades that make sense before a full replacement

    • Add or repair weatherstripping so the sash closes tightly.
    • Use caulk where the frame meets the wall if gaps are visible.
    • Consider storm windows or interior inserts when full replacement is not justified.
    • Use insulated curtains or shades in rooms with strong sun or cold exposure.
    • Replace failed or fogged units first if the seals are broken and the glass is no longer doing its job.

    The point is not to worship patchwork fixes forever. The point is to spend money where the return is believable. A house that leaks air around the attic and doors does not become efficient because the brochure used the word “premium” five times.

    One more thing: sealing and insulating are linked to indoor air quality. A tighter house needs a little more thought about ventilation and moisture management. That is why the EPA’s indoor air quality guidance matters here. Do not make the home tight and then pretend air no longer matters. It does.

    Heating And Cooling Efficiency Basics

    Once the house stops bleeding energy through the envelope, look at the equipment that has to do the remaining work. HVAC systems get blamed for everything because they are the loudest machines in the room. Sometimes the blame is fair. Sometimes the system is just trying to overcome a building shell that should have been improved years ago.

    Start with the basic maintenance tasks. Change filters on schedule. Clear vents and registers. Make sure ducts are not obviously leaking. Keep outdoor units free of debris. Have equipment serviced when needed. None of that is flashy, and that is exactly why it matters. Boring maintenance is what keeps a system from working harder than necessary.

    After maintenance comes fit. An older unit may be inefficient because it is old, but it may also be inefficient because it is oversized, poorly installed, or working against a leaky house. Replacing equipment without checking the actual problem is how people end up paying for an expensive new mistake. The ENERGY STAR Save at Home guidance is a decent reminder that the whole house matters, not just the brand name on the unit.

    If you are considering a replacement, efficient options such as modern heat pumps can make sense, especially when the existing system is aging. Zoning can also help in larger homes or homes with uneven use patterns. The trick is not to add complexity for its own sake. Zoning should solve a real comfort problem, not give the installer a reason to sound clever.

    What to ask before replacing HVAC

    • Has the house been air sealed and insulated enough to support the new system?
    • Are the ducts sealed and sized properly?
    • Is the current system failing because of age, or because it was never a good fit?
    • Will a zoned setup actually solve a specific problem, or just add another control layer?
    • Can the new equipment run efficiently at the loads your house actually needs?

    That last question matters. The goal is not to install the most powerful unit. The goal is to install the right one. A system that cycles constantly because it was sized poorly is not efficient. It is just busy.

    Smart Thermostats And Scheduling As Support Tools

    Smart thermostats get a lot of attention because they look like progress. Sometimes they are. Sometimes they are just a nicer screen on top of the same bad habits. The truth is less exciting and more useful: smart thermostats help most when the house already has reasonable insulation, air sealing, and a predictable daily routine.

    The best thermostat is the one that matches the way the household actually lives. If people leave at 8 a.m., return at 6 p.m., and sleep at roughly the same time most nights, scheduling can trim waste without making comfort miserable. If the household routines change every day, the thermostat needs to be flexible rather than clever. Otherwise it becomes another device everyone argues with.

    Use scheduling to reduce unnecessary runtime, not to create a mini religion around temperature. Small setbacks during unoccupied hours are often enough. Aggressive swings can be counterproductive if they make the home feel uncomfortable and cause people to override the settings repeatedly. The machine should support habits, not punish them.

    Home automation control display demonstrating connected household technologies

    A thermostat also works best when it is paired with realistic expectations. It cannot repair bad insulation. It cannot eliminate a draft under a door. It cannot outsmart a duct system that leaks into a crawl space. What it can do is keep the house from heating or cooling itself for no reason. That is useful, but it is not sorcery.

    If you want a simple test, ask whether the thermostat helps you do one of three things better: keep occupied rooms comfortable, avoid needless heating or cooling when the house is empty, or simplify a schedule that used to be manual. If the answer is no, the upgrade may be more cosmetic than useful.

    Lighting And Appliance Habits That Reduce Waste

    Once the building shell and major mechanical systems are sorted, the small stuff matters more. Not because it is dramatic, but because everything else has already been trimmed. This is where lighting and appliances stop being background noise and start becoming the remaining waste bucket.

    LED lighting is the obvious first move. It uses less electricity, lasts longer, and reduces heat compared with old incandescent bulbs. That means less wasted energy and less work for cooling in rooms that run warm in summer. Use LEDs where people actually spend time, then pay attention to brightness and color temperature so the room still feels usable. Efficiency is not an excuse for miserable light.

    After lighting, inspect the habits around appliances. A smart dishwasher or washer can help if it offers useful scheduling or cycle options, but the machine itself is only part of the equation. The way it is used matters too. Running half loads, blasting the hottest cycle for everything, or leaving electronics awake all day is not sophisticated. It is simply waste with better packaging.

    Small habits that actually move the needle

    • Replace the worst bulbs first, then finish the rest of the house room by room.
    • Use power strips or smart plugs for devices that draw standby power.
    • Run laundry and dishwashing with sensible load sizes and cycle choices.
    • Keep refrigerator coils clean and door seals intact.
    • Do not heat or cool rooms you are not using unless there is a reason to do so.

    Smart appliances can help, but they are not automatically efficient just because they are connected. A connected appliance that wastes power at a faster, more trackable rate is still wasting power. The screen is not the point. The actual operating behavior is the point.

    And yes, the EPA’s general energy guidance is still relevant here because the same logic keeps applying: reduce unnecessary load first, then improve the systems that remain.

    A Simple Priority Checklist For Homeowners

    If you want the short version, use this order. It is not exotic. That is why it works.

    Priority Upgrade Why it usually matters first
    1 Air sealing Stops obvious leaks and makes the whole house easier to condition.
    2 Insulation Reduces heat loss and heat gain after the leaks are under control.
    3 HVAC maintenance and duct checks Keeps the existing system from wasting effort on avoidable losses.
    4 Window repairs or selective upgrades Improves comfort where drafts, failed seals, or poor glass are real problems.
    5 Smart thermostat and schedules Reduces avoidable runtime once the house is already behaving better.
    6 LED lighting and appliance habits Trims the remaining waste after the bigger losses are handled.

    That order is blunt because the house is blunt. It loses the most where the building shell is weakest and where equipment has to cover for bad conditions. Fix those first. The rest becomes easier, cheaper, and less annoying.

    1. Walk the house and note the worst drafts, hot rooms, cold rooms, and moisture clues.
    2. Seal obvious air leaks, especially in the attic, around doors, and around penetrations.
    3. Upgrade insulation where the attic or other exposed spaces are clearly underperforming.
    4. Service or evaluate HVAC before replacing it.
    5. Use smart controls only after the house is not fighting you at every turn.
    6. Finish with lighting and appliance habits, which are worth fixing but rarely the first big win.

    That is the whole checklist. Not exciting, but effective. The boring answer is often the right one, and houses are not impressed by our preferences.

    What To Do Next

    If you are deciding where to start this month, start with the cheapest diagnostic step that exposes the biggest problem. For many homes, that means a careful walk-through, a draft check, and a look at the attic before any equipment sales pitch enters the room. If the house already has decent insulation and air sealing, then move down the list. If it does not, stop pretending the thermostat is the hero.

    The practical takeaway is simple: treat energy efficiency as a sequence, not a shopping spree. Fix the shell, then the systems, then the controls, then the habits. That order usually gives the best mix of comfort, lower waste, and less regret.

    If you want to keep reading on the topic, return to the home page or use the contact page if you want help thinking through a specific upgrade path. Bring the symptom, not the sales pitch. That is usually where the real problem starts to show itself.

  • How to Plan a Smart Home That Feels Simple to Use

    How to Plan a Smart Home That Feels Simple to Use

    A smart home feels simple when the household can use it without thinking about the tool behind it. The aim is not to collect the most devices. It is to make ordinary moments – arriving home, getting ready in the morning, leaving for the day, settling down at night – easier to manage.

    If you want the broader site context, the home page and about page show the same practical approach. This guide stays focused on the planning choices that keep a system usable.

    Connected living room with a clean media wall and warm ambient lighting

    What Makes a Smart Home Feel Simple Instead of Complicated

    A simple smart home has a few clear qualities. First, the most common actions should have an obvious control path. Second, the naming should make sense to anyone in the house. Third, the system should still work when a guest, a child, or a less technical family member uses it.

    Complication usually starts when a setup grows device by device with no plan. One app controls lights, another handles climate, a third app manages speakers, and a fourth app is needed because one device refused to join the others. At that point the household is not using automation. It is maintaining a small software collection.

    The useful question is not, “What else can this home do?” It is, “What daily task can this make easier without adding another step?”

    • Keep the number of control surfaces low.
    • Use names that describe rooms and actions, not model numbers.
    • Keep manual control available even when automation is in place.
    • Favor a few repeatable routines over dozens of clever ones.

    Start with Daily Routines, Not Gadgets

    Before buying anything, walk through the routines that happen every day. Morning, leaving home, coming back, bedtime, and weekend cleanup are usually the best places to start. Those routines reveal where automation can remove friction instead of creating it.

    For example, a household might only need three or four well-chosen automations:

    • A morning scene that turns on the kitchen light and brings the thermostat to a comfortable setting.
    • A leave-home routine that turns off lights and locks the doors.
    • An evening routine that dims the living room and closes selected blinds.
    • A bedtime routine that keeps only the useful lights on for a late-night trip to the kitchen.

    The point is to support habits people already have. If a routine is hard to explain out loud, it is probably too complicated for the first version of the home.

    It also helps to think in terms of zones rather than devices. One family may care most about the entryway, another about the kitchen, and another about the bedroom. Starting from routines keeps the plan tied to real use instead of gadget catalogs.

    Choose a Central App or Platform Before Buying Devices

    One of the best planning decisions happens before the first purchase: choose the main place where the household will control things. A central app or platform reduces confusion because people do not have to remember which tool runs which device.

    For mixed-device homes, the Matter standard is worth understanding because it is designed to make device compatibility less fragile. If you want an example of a single-control-layer approach, the Home Assistant getting started guide shows how one dashboard can organize many devices. For a plain-language overview of the field, the home automation overview is enough background to keep the terms straight.

    Do not confuse “central” with “complicated.” A good central app should do three things well: show the current state of the house, make the most common actions obvious, and keep the setup readable when someone else needs to use it.

    When you compare devices, ask practical questions:

    • Will this device work in the main app we already use?
    • Can it still be controlled manually if the app is unavailable?
    • Will it make the room easier to understand, or just add another icon?
    • Can a guest figure it out without a tutorial?

    If the answer to the last question is no, the device may not belong in the first version of the system.

    Group Controls by Room and Purpose

    People think in rooms and functions. They do not usually think in device categories. That means the interface should follow the way the household already reasons about the home.

    A useful structure is to group controls in two layers: first by room, then by purpose. For example, a living room may have lighting, climate, and media controls in one place. A hallway may only need lighting and security. A bedroom may need lighting, blinds, and temperature, but not much else.

    Household need Keep it simple by… Why it helps
    Lighting Using one clear scene for each room People know what happens when they tap it
    Climate Keeping settings tied to the room, not to a hidden schedule Temperature changes feel predictable
    Security Keeping lock and alarm controls easy to find Fewer mistakes in a hurry
    Media Using one labeled control for the main room Guests do not have to hunt through menus

    Labels matter more than people expect. “Dining lights” is clearer than “Scene 4.” “Bedtime” is clearer than “Evening 2.” If a label sounds like it belongs in a software manual, it probably needs another draft.

    Tips for Keeping Automations Understandable for Guests and Family

    Automations should feel helpful, not mysterious. A guest should be able to enter the house, turn on a light, and understand the main controls without asking for a password or a guided tour.

    The easiest way to keep things understandable is to make the automated layer small and the manual layer obvious. That means physical switches still matter. Wall controls, tablet dashboards, and a few clearly named app shortcuts are often enough.

    Try these habits:

    • Use plain labels such as “Good night,” “Away,” and “Dinner.”
    • Limit each room to a small number of common scenes.
    • Keep a visible fallback control for lights and climate.
    • Write down a short cheat sheet for guests or family members.
    • Test the setup with someone who did not help build it.

    That last step is the one people skip. It is also the one that reveals whether the home is genuinely simple or merely familiar to the person who configured it.

    If a routine needs a paragraph of explanation, the design is doing too much work.

    Common Mistakes That Make Smart Homes Harder to Live With

    Most frustration comes from a few predictable mistakes. The first is buying devices before deciding how the home should actually work. The second is spreading controls across too many apps. The third is automating every small action because it seems possible.

    Other common problems are less obvious:

    • Using different names for the same room in different apps.
    • Making automations that depend on hidden timing rules no one remembers.
    • Relying on motion or voice control for everything, even when a switch would be easier.
    • Ignoring Wi-Fi strength, power reliability, or basic network setup.
    • Removing manual control in the name of convenience.

    A smart home should be more forgiving than the average software setup, not less. If a device or scene causes regular confusion, it is usually better to simplify it than to keep tuning it forever.

    There is a quiet rule here: the more often people use a control, the more ordinary it should look and behave.

    A Simple Way to Start

    If you are planning from scratch, start with one room, one app, and one routine. Get that working well before adding another layer. A small, well-used system is usually more valuable than a large, half-understood one.

    That is the practical test for the whole project: can the home make daily life easier without making the household learn a new language?

    If you want to talk through a plan before buying anything, use the contact page. A careful first draft beats a cluttered second opinion every time.