Smart home design, energy efficiency, and connected lighting guidance.

Author: Rowan Ellis

  • Smart Lighting Solutions for Every Room in the House

    Smart Lighting Solutions for Every Room in the House

    {“title”:”Smart Lighting Solutions for Every Room in the House”,”post_name”:”smart-lighting-solutions-every-room”,”author_id”:10,”content”:”

    n

    Smart lighting shouldn’t feel like another app you have to manage. With a few practical design choices—layered brightness, the right color temperature, and sensible scenes—you can make every room in your home feel more comfortable, easier, and more “you.”

    nn

    When you start looking at smart lights, you might wonder: What can smart lighting do beyond on/off? How do I pick warm vs. cool light? And how can I avoid over-automation that gets in the way? As the U.S. Department of Energy notes, the choices you make about lighting efficiency and quality can significantly affect how well spaces serve the people using them.

    nn

    On top of comfort, lighting is also an everyday sustainability lever. Energy.gov explains that lighting accounts for a meaningful share of household electricity use, so improving efficiency (for example, by using LED technology and controlling light when it’s not needed) can contribute to lower energy waste. Smart controls aren’t magic, but they help you match light to real routines instead of leaving it on “just in case.”

    nn

    By the end of this guide, you’ll have a room-by-room plan: what to aim for in kitchens, bedrooms, hallways, and living spaces, how to think about dimmers, scenes, sensors, and schedules, and a simple checklist you can use before you buy anything.

    n

    nn


    nn

    What smart lighting can do (besides on/off)

    n

    Smart lighting is mostly about control and consistency—the ability to set light levels and behavior in a repeatable way.

    nn

      n

    • Dimming: Adjust brightness to match time of day, tasks, and energy-saving goals.
    • n

    • Scenes: Save “lighting moods” (like Relaxed Evening or Wake-Up) so you don’t rebuild settings each time.
    • n

    • Sensors: Use motion or ambient-light sensing to reduce unnecessary lighting.
    • n

    • Schedules & routines: Automate predictable changes (for example, morning warmth, bedtime dimming).
    • n

    nn

    If this sounds straightforward, it is—until you try to automate everything. The rest of this article is about choosing the right level of automation so your home stays simple.

    nn

    Energy.gov lighting guidance (with utm_source=brehand-gouessant.com) covers the fundamentals of lighting choices and efficiency.

    nn

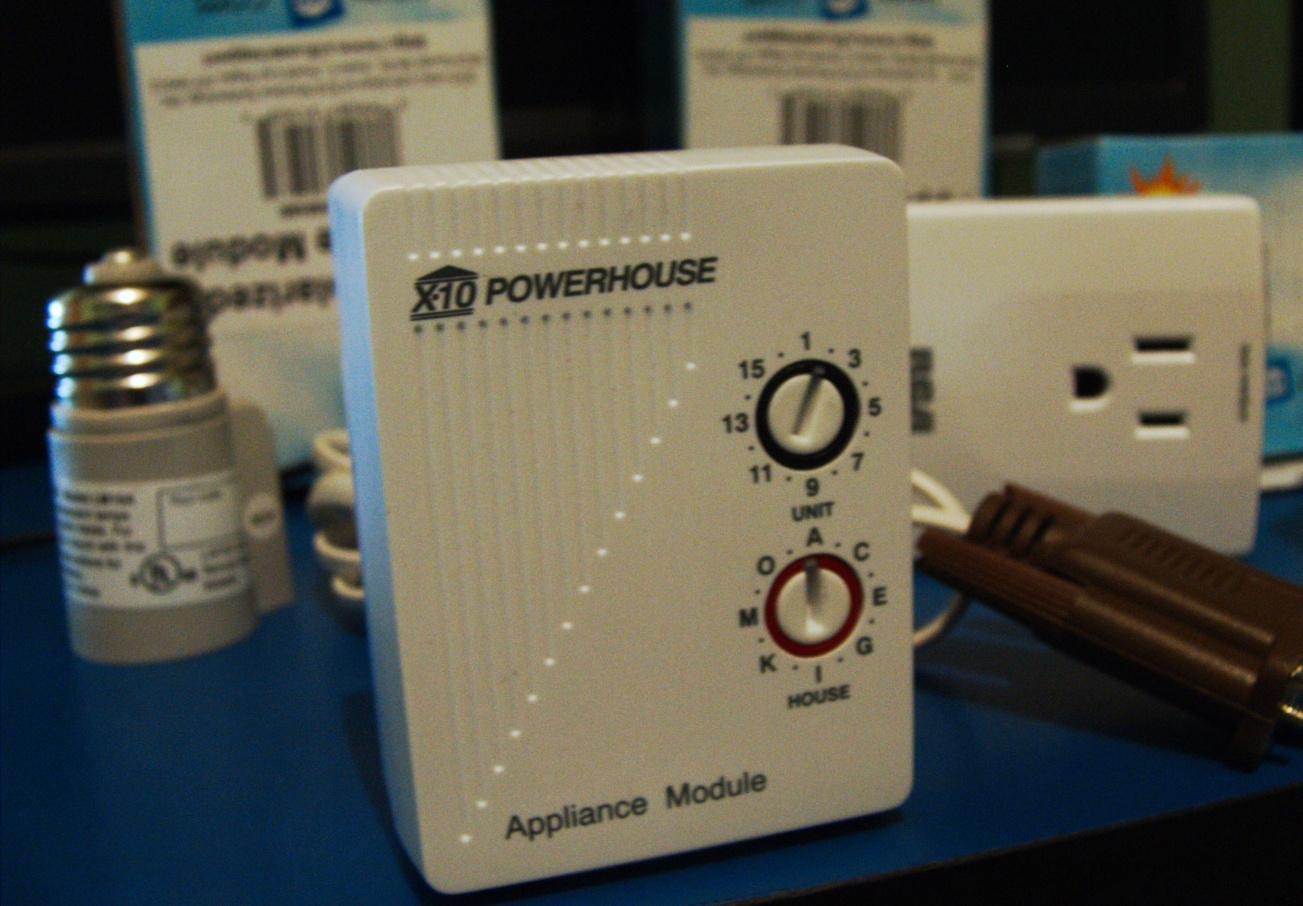
    nSmart home control adapter connected for everyday home lighting routinesn

    nn


    nn

    Best lighting goals by room

    n

    Instead of starting with fixtures, start with the job each room needs light to do. Here are practical goals that translate into smart lighting features.

    nn

    Kitchen: clarity first, glare last

    n

      n

    • Goal: Bright, even light for prep and cleanup.
    • n

    • Smart approach: Use dimming for “working” vs. “leisure cooking,” and create a scene for evening dining that isn’t harsh on tired eyes.
    • n

    • Watch for: Glare from overhead lights when you’re looking down at counters.
    • n

    nn

    Living room: flexible comfort

    n

      n

    • Goal: Layered brightness that supports conversation, reading, and TV time.
    • n

    • Smart approach: Separate general light from accent or lamp light, then group them into scenes.
    • n

    • Watch for: One “all lights on” setting that never matches what you’re actually doing.
    • n

    nn

    Bedroom: slower changes, gentler tones

    n

      n

    • Goal: Relaxation in the evening and easy visibility when you wake up.
    • n

    • Smart approach: Use schedules for gradual transitions (for example, dim slightly in the late evening).
    • n

    • Watch for: Very bright, very cool light close to bedtime.
    • n

    nn

    Hallways & entryways: safe wayfinding

    n

      n

    • Goal: Reduce trips and surprise brightness.
    • n

    • Smart approach: Motion sensors for short, low-glare light levels at night.
    • n

    • Watch for: Lights that stay on too long or snap on at an uncomfortable level.
    • n

    nn

    Home office: focus without fatigue

    n

      n

    • Goal: Stable, task-friendly lighting for screens and paper.
    • n

    • Smart approach: Automate by time of day and allow manual override so you can fine-tune when working late.
    • n

    • Watch for: Reflections on monitors—sometimes changing brightness beats changing color.
    • n

    nn

    Energy.gov: Lighting Choices also helps you think about what “good lighting” means in real spaces.

    nn


    nn

    Dimmers, scenes, sensors, and schedules—explained simply

    n

    These features solve different problems. Here’s the clean way to tell them apart.

    nn

    n

    n

    n

    n

    n

    n

    n

    n

    n

    n

    n

    n

    n

    n

    n

    n

    n

    n

    n

    n

    n

    n

    n

    n

    n

    n

    n

    n

    n

    n

    Feature What it does Where it’s most useful
    Dimmers Change brightness smoothly Living rooms, bedrooms, kitchens
    Scenes Recall multiple settings at once Living rooms, dining areas, “company over” moments
    Sensors React to motion and/or ambient light Hallways, bathrooms, laundry rooms
    Schedules Follow the clock Bedrooms, offices, general evening routines

    nn

    Useful rule of thumb: if your behavior is predictable, schedules work well; if your behavior is variable, sensors can help; and if you want an “instant mood,” scenes are the best shortcut.

    nn


    nn

    Warm vs. cool light: how to choose for comfort

    n

    Color temperature is the “warmth” of light. In general terms:

    nn

      n

    • Warmer (lower color temperature): Feels cozy and less intense—often better for evenings and bedrooms.
    • n

    • Cooler (higher color temperature): Feels brighter and more alert—often better for task-focused areas like kitchens and home offices.
    • n

    nn

    Rather than chasing a perfect number, aim for a consistent experience. If your living room switches from warm in the evening to cool in the middle of dinner, that can feel jarring even if the room is “well lit.”

    nn

    For deeper background on lighting color quality and terminology, see Energy.gov’s Lighting Choices guide.

    nn


    nn

    How to avoid glare and over-automation

    n

    Two of the most common reasons smart lighting gets frustrating are visual discomfort (like glare) and behavior conflicts (automation fighting your habits).

    nn

    Reduce glare with layered lighting

    n

      n

    • Prefer a mix of ceiling light + lamps rather than only one bright source.
    • n

    • Use dimming for overhead lights instead of relying on “always full brightness.”
    • n

    • When possible, aim accent light so it doesn’t reflect directly into eyes or screens.
    • n

    nn

    Set “hands welcome” rules

    n

    If you manually adjust light and the system immediately overrides you, you’ll start ignoring automations. A calmer pattern is: allow overrides and let the next scene or scheduled change take over later.

    nn

    Start with fewer automations than you think

    n

    Choose one or two wins first—like a bedtime dim scene and hallway night lighting—then expand once your routines are stable.

    nn

    Energy.gov also emphasizes practical, user-centered lighting decisions rather than purely technical upgrades.

    nn


    nn

    A quick checklist for planning a lighting upgrade

    n

    Before you buy, walk through your rooms and decide what “good” looks like.

    nn

      n

    1. List each room’s main jobs: cooking, reading, watching TV, sleeping, wayfinding.
    2. n

    3. Pick your lighting layers: general, task, and accent.
    4. n

    5. Choose brightness ranges: one for tasks, one for everyday comfort, one for evening/bedtime.
    6. n

    7. Decide which features match the job: dimming vs. scenes vs. sensors vs. schedules.
    8. n

    9. Plan for glare: avoid relying on a single overhead light in every situation.
    10. n

    11. Keep overrides easy: make sure manual changes don’t feel punished.
    12. n

    13. Test with real routines: run your scenes/schedules for several days before adding more.
    14. n

    nn

    If you’re also building the broader smart-home setup, you may find the big-picture guide helpful: Home and the blog index can help you connect lighting choices with comfort and energy priorities across the house.

    nn

    Conclusion: Smart lighting works best when it serves the room’s real purpose. Layer brightness, pick comfortable warmth levels, use scenes and schedules for repeatable routines, and add sensors only where they reduce hassle—not where they create it.

    nn

    By following this room-by-room plan, you can upgrade lighting in a way that feels intuitive to live with—no engineering degree required.

    nn


    nn

    External reading:

    n

    “,”featured_id”:1}

  • How to Plan a Smart Home That Feels Simple to Use

    How to Plan a Smart Home That Feels Simple to Use

    A smart home feels simple when the household can use it without thinking about the tool behind it. The aim is not to collect the most devices. It is to make ordinary moments – arriving home, getting ready in the morning, leaving for the day, settling down at night – easier to manage.

    If you want the broader site context, the home page and about page show the same practical approach. This guide stays focused on the planning choices that keep a system usable.

    Connected living room with a clean media wall and warm ambient lighting

    What Makes a Smart Home Feel Simple Instead of Complicated

    A simple smart home has a few clear qualities. First, the most common actions should have an obvious control path. Second, the naming should make sense to anyone in the house. Third, the system should still work when a guest, a child, or a less technical family member uses it.

    Complication usually starts when a setup grows device by device with no plan. One app controls lights, another handles climate, a third app manages speakers, and a fourth app is needed because one device refused to join the others. At that point the household is not using automation. It is maintaining a small software collection.

    The useful question is not, “What else can this home do?” It is, “What daily task can this make easier without adding another step?”

    • Keep the number of control surfaces low.
    • Use names that describe rooms and actions, not model numbers.
    • Keep manual control available even when automation is in place.
    • Favor a few repeatable routines over dozens of clever ones.

    Start with Daily Routines, Not Gadgets

    Before buying anything, walk through the routines that happen every day. Morning, leaving home, coming back, bedtime, and weekend cleanup are usually the best places to start. Those routines reveal where automation can remove friction instead of creating it.

    For example, a household might only need three or four well-chosen automations:

    • A morning scene that turns on the kitchen light and brings the thermostat to a comfortable setting.
    • A leave-home routine that turns off lights and locks the doors.
    • An evening routine that dims the living room and closes selected blinds.
    • A bedtime routine that keeps only the useful lights on for a late-night trip to the kitchen.

    The point is to support habits people already have. If a routine is hard to explain out loud, it is probably too complicated for the first version of the home.

    It also helps to think in terms of zones rather than devices. One family may care most about the entryway, another about the kitchen, and another about the bedroom. Starting from routines keeps the plan tied to real use instead of gadget catalogs.

    Choose a Central App or Platform Before Buying Devices

    One of the best planning decisions happens before the first purchase: choose the main place where the household will control things. A central app or platform reduces confusion because people do not have to remember which tool runs which device.

    For mixed-device homes, the Matter standard is worth understanding because it is designed to make device compatibility less fragile. If you want an example of a single-control-layer approach, the Home Assistant getting started guide shows how one dashboard can organize many devices. For a plain-language overview of the field, the home automation overview is enough background to keep the terms straight.

    Do not confuse “central” with “complicated.” A good central app should do three things well: show the current state of the house, make the most common actions obvious, and keep the setup readable when someone else needs to use it.

    When you compare devices, ask practical questions:

    • Will this device work in the main app we already use?
    • Can it still be controlled manually if the app is unavailable?
    • Will it make the room easier to understand, or just add another icon?
    • Can a guest figure it out without a tutorial?

    If the answer to the last question is no, the device may not belong in the first version of the system.

    Group Controls by Room and Purpose

    People think in rooms and functions. They do not usually think in device categories. That means the interface should follow the way the household already reasons about the home.

    A useful structure is to group controls in two layers: first by room, then by purpose. For example, a living room may have lighting, climate, and media controls in one place. A hallway may only need lighting and security. A bedroom may need lighting, blinds, and temperature, but not much else.

    Household need Keep it simple by… Why it helps
    Lighting Using one clear scene for each room People know what happens when they tap it
    Climate Keeping settings tied to the room, not to a hidden schedule Temperature changes feel predictable
    Security Keeping lock and alarm controls easy to find Fewer mistakes in a hurry
    Media Using one labeled control for the main room Guests do not have to hunt through menus

    Labels matter more than people expect. “Dining lights” is clearer than “Scene 4.” “Bedtime” is clearer than “Evening 2.” If a label sounds like it belongs in a software manual, it probably needs another draft.

    Tips for Keeping Automations Understandable for Guests and Family

    Automations should feel helpful, not mysterious. A guest should be able to enter the house, turn on a light, and understand the main controls without asking for a password or a guided tour.

    The easiest way to keep things understandable is to make the automated layer small and the manual layer obvious. That means physical switches still matter. Wall controls, tablet dashboards, and a few clearly named app shortcuts are often enough.

    Try these habits:

    • Use plain labels such as “Good night,” “Away,” and “Dinner.”
    • Limit each room to a small number of common scenes.
    • Keep a visible fallback control for lights and climate.
    • Write down a short cheat sheet for guests or family members.
    • Test the setup with someone who did not help build it.

    That last step is the one people skip. It is also the one that reveals whether the home is genuinely simple or merely familiar to the person who configured it.

    If a routine needs a paragraph of explanation, the design is doing too much work.

    Common Mistakes That Make Smart Homes Harder to Live With

    Most frustration comes from a few predictable mistakes. The first is buying devices before deciding how the home should actually work. The second is spreading controls across too many apps. The third is automating every small action because it seems possible.

    Other common problems are less obvious:

    • Using different names for the same room in different apps.
    • Making automations that depend on hidden timing rules no one remembers.
    • Relying on motion or voice control for everything, even when a switch would be easier.
    • Ignoring Wi-Fi strength, power reliability, or basic network setup.
    • Removing manual control in the name of convenience.

    A smart home should be more forgiving than the average software setup, not less. If a device or scene causes regular confusion, it is usually better to simplify it than to keep tuning it forever.

    There is a quiet rule here: the more often people use a control, the more ordinary it should look and behave.

    A Simple Way to Start

    If you are planning from scratch, start with one room, one app, and one routine. Get that working well before adding another layer. A small, well-used system is usually more valuable than a large, half-understood one.

    That is the practical test for the whole project: can the home make daily life easier without making the household learn a new language?

    If you want to talk through a plan before buying anything, use the contact page. A careful first draft beats a cluttered second opinion every time.